Diabetes testing strips may look simple, but they contain delicate chemicals that react with a small blood sample. The strip, glucose meter, your hands, storage conditions, and testing technique all influence the result. In this guide, I will show you how to use blood glucose test strips correctly, reduce painful finger pricks, and know what to do when a reading does not make sense.

What Are Diabetes Testing Strips?
A blood glucose test strip is a small, disposable strip designed to work with a specific glucose meter. After the strip draws in a blood sample, enzymes on the strip react with glucose. The meter measures the electrical signal created by that reaction and displays an estimated blood glucose value in mg/dL or mmol/L.
The strip is not simply a piece of paper. Its chemical layer can be damaged by moisture, heat, cold, contamination, age, or incorrect handling. This is why correct storage and technique matter.
Home glucose meters are designed to monitor diabetes and identify patterns. They are not laboratory instruments, and a home reading should not be used by itself to diagnose diabetes. If you are being evaluated for diabetes, your clinician may order laboratory blood tests such as fasting plasma glucose, A1C, or an oral glucose tolerance test.
How to Choose the Correct Blood Glucose Test Strips
Test strips are not interchangeable. A strip from another brand—or sometimes another model from the same brand—may fit physically but still produce an error or an inaccurate result.
- Match the exact meter: check the meter manual and the strip package for compatible model names.
- Buy new, sealed supplies: use a pharmacy, licensed distributor, manufacturer, or another trusted source.
- Check the expiration date: do not use expired strips, even if they look normal.
- Inspect the package: avoid vials or foil packets that are opened, cracked, wet, altered, or damaged.
- Consider ongoing cost: the meter may be inexpensive while its compatible strips are costly. Check insurance coverage and strip availability before choosing a meter.
- Consider usability: sample size, display readability, audio support, memory, app connection, and whether more blood can be added after an insufficient sample may matter.
Avoid pre-owned or unauthorized strips
The FDA advises against buying secondhand test strips. You may not know whether they were expired, exposed to heat or humidity, tampered with, contaminated with blood, or authorized for use with your meter. An inaccurate result can lead to too much or too little medication.
How to Use Diabetes Testing Strips Correctly
- Prepare your supplies. Have your meter, compatible strip, lancing device, new lancet, record or app, and sharps container ready. Check the strip date and package.
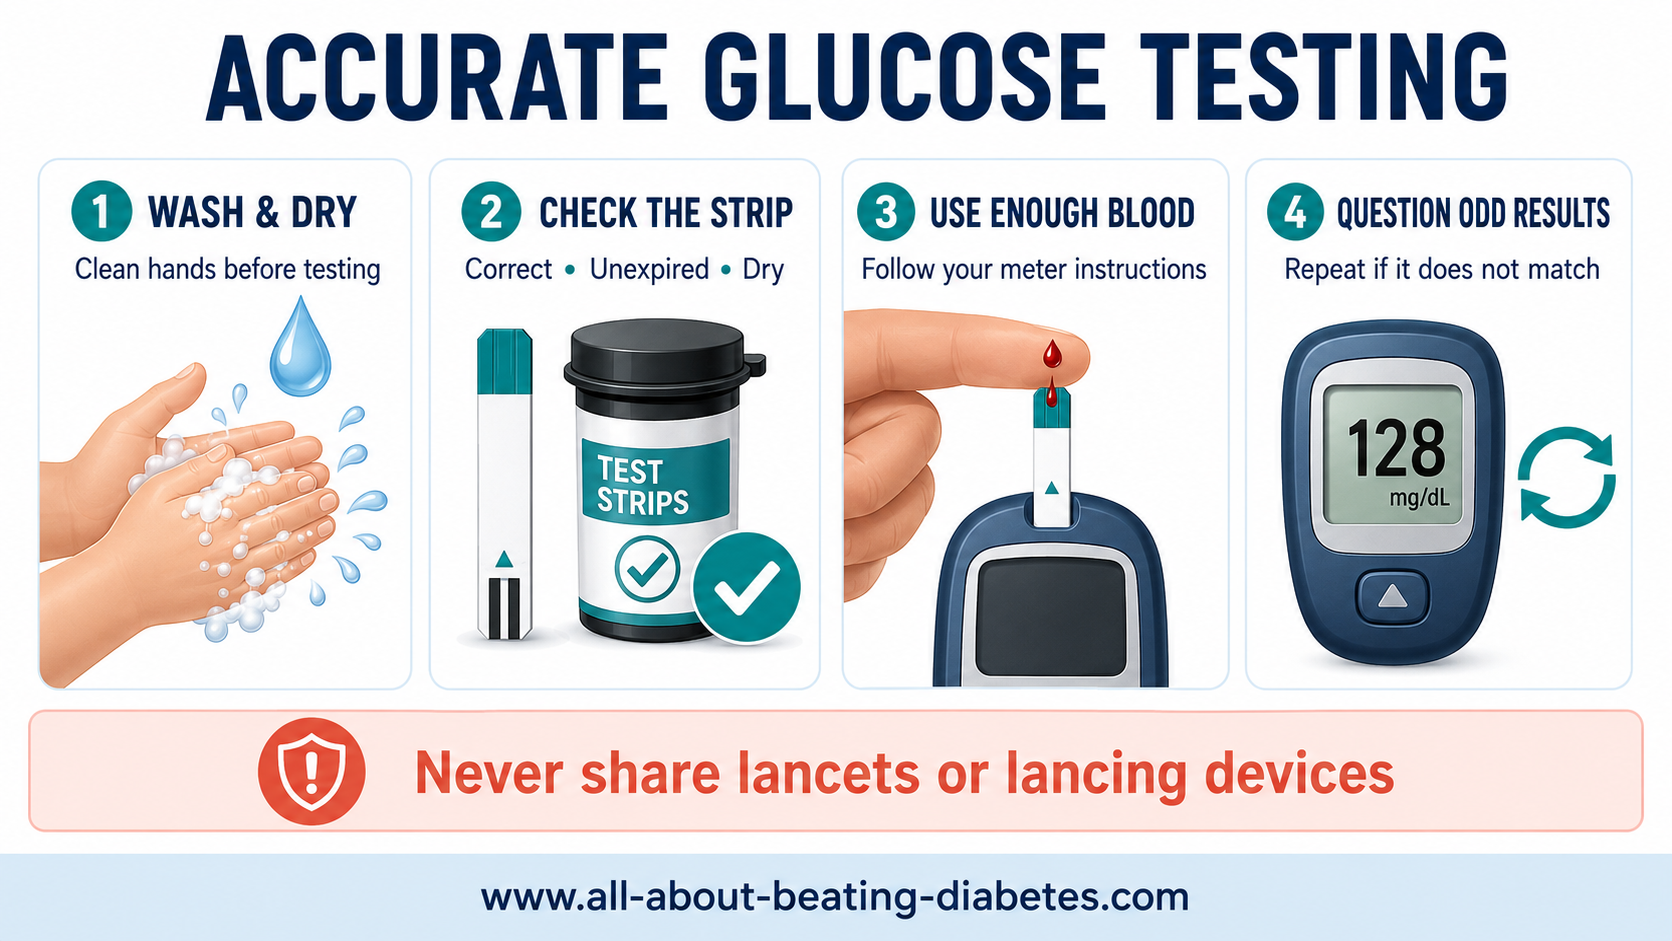
- Wash your hands. Use soap and warm water, then dry completely. Sugar from fruit, food, drinks, lotion, or another substance on a finger can cause a falsely high reading. Water left on the skin may dilute the sample.
- Warm cold hands. Warm water or gently moving the hands can improve circulation. Avoid forcefully squeezing the fingertip.
- Insert the strip as directed. Many meters turn on automatically. Confirm that any code displayed is correct only if your system uses manual coding.
- Load a new lancet. Set the lancing device to the shallowest depth that reliably produces enough blood.
- Use the side of the fingertip. This area is often less sensitive than the center. Rotate fingers and puncture sites to reduce soreness.
- Form the blood drop gently. Allow blood to flow. If needed, gently massage from the base of the finger toward the tip rather than squeezing hard around the puncture.
- Apply blood exactly as instructed. Touch the correct edge or channel of the strip to the drop. Do not smear blood on top unless your strip instructions specifically say to do so.
- Wait for the meter result. Do not remove or move the strip early. Record the time, relation to food, medication, activity, and symptoms when that context is useful.
- Dispose of supplies safely. Put the used lancet immediately into an approved sharps container. Follow local rules for strip disposal and sharps collection.
Learn how timing changes interpretation in my guide to blood sugar levels before meals, after meals, at bedtime, and during the night.
How to Store Test Strips
Always follow the temperature and storage range printed by the manufacturer. In general:
- Keep strips in their original vial or individual foil wrapper.
- Close a vial immediately after removing one strip.
- Keep strips dry and protect them from heat, direct sunlight, freezing, and high humidity.
- Do not store strips in a bathroom, near a stove, on a sunny windowsill, or for long periods in a hot or freezing car.
- Do not transfer strips into another bottle, plastic bag, or pill organizer.
- Do not touch the blood-sampling area with wet or dirty hands.
- Do not use a strip that is bent, torn, discolored, wet, or otherwise damaged.
- Check both the printed expiration date and any “use within” period that starts when the vial is first opened.
If your strip manufacturer asks you to write the opening date on the vial, do so. Individually wrapped strips remain protected until the foil is opened, but the package must still be intact and within its expiration date.
Do You Need to Code Your Glucose Meter?
Not necessarily. The old advice to code the meter with every new box is outdated for many current systems. Most newer meters identify the strip lot automatically and are often described as “no coding” meters.
Some older meters still require a code chip, calibration key, or manually entered number. If yours does, the meter code must match the code provided with the strip vial or package. A wrong code can produce an inaccurate result.
The safest rule
Follow the manual for your exact meter and strip system. Do not enter a code merely because another meter required one, and do not skip coding if your manual says it is necessary.
When Should You Use Glucose Control Solution?
Control solution contains a known amount of glucose. It checks whether the meter and strips are working together within the control range printed on the strip vial or package. A control test does not check your personal blood glucose and its acceptable range is not the same as your target range.
Use control solution at the times recommended by your meter manufacturer. Common reasons include:
- when opening a new meter or learning how to test;
- when opening a new vial or lot of strips, if the instructions recommend it;
- after the meter is dropped, damaged, cleaned, or exposed to an unusual temperature;
- when strips may have been stored incorrectly;
- when repeated results do not match symptoms or expected glucose patterns.
Check the expiration and opening-life instructions for the control solution itself. Use the correct solution for the meter, and compare the result with the control range for that strip lot. If the result is outside the range, repeat the procedure carefully. Do not use the meter result for treatment until the problem is resolved with the manual, manufacturer, pharmacist, or diabetes team.
Why Can a Glucose Meter Reading Be Wrong?
| Possible problem | How it may affect the result | What to do |
|---|---|---|
| Food, sugar, fruit, or lotion on fingers | May produce a falsely high reading | Wash with soap and water and dry completely before retesting. |
| Wet hands or alcohol not fully dry | May dilute or contaminate the blood drop | Wait until the skin is completely dry. |
| Too little blood or incorrect application | May trigger an error or an unreliable result | Use a new strip and the sample size described in the manual. |
| Hard squeezing around the puncture | Tissue fluid may mix with the sample | Warm the hand, lower it briefly, and massage gently toward the fingertip. |
| Wrong, expired, damaged, or poorly stored strip | Chemical reaction may be unreliable | Use a correct, intact, unexpired strip from a trusted supply. |
| Temperature outside the meter’s operating range | The enzyme and meter reaction may be inaccurate | Move supplies to an allowed temperature and wait as instructed before testing. |
| Alternative-site sample while glucose is changing quickly | The result may lag behind a fingertip reading | Use a fingertip when low glucose is suspected, after meals or exercise, during illness, or when the result does not match symptoms. |
| Dehydration, shock, altered hematocrit, low oxygen, high altitude, or an interfering medicine | Effect depends on the meter technology and condition | Check the meter’s limitations and seek clinical or laboratory confirmation when needed. |
How accurate should a home glucose meter be?
Home meters are useful but not exact. The FDA performance criteria summarized in the 2026 American Diabetes Association Standards expect 95% of results from a home-use system to fall within 15% of the comparison value and 99% within 20% across the meter’s usable range under testing conditions. These criteria do not guarantee that every individual result will be within that difference.
Small differences between two meters or two finger sticks can occur because the blood drops and devices are not identical. If readings are repeatedly very different from a laboratory result or your symptoms, bring the meter and strips to your appointment. Your clinician can observe your technique and arrange a closely timed comparison.
What Should You Do If a Result Does Not Match How You Feel?
- Look at your symptoms first. If you have clear symptoms of low glucose, follow your prescribed low-glucose plan promptly rather than delaying treatment for repeated troubleshooting.
- Wash and completely dry your hands.
- Check the meter, strip compatibility, expiration date, storage, and displayed error message.
- Repeat the test from a fingertip with a new strip.
- If the repeated result is still unexpected, use control solution if instructed and contact the manufacturer or your healthcare professional.
Do not let a reassuring meter number override dangerous symptoms
Seek urgent medical help for confusion, fainting, a seizure, inability to swallow, severe weakness, chest pain, trouble breathing, persistent vomiting, severe dehydration, or symptoms of diabetic ketoacidosis. If the meter shows “HI,” “LO,” or another out-of-range message, follow the meter manual and your emergency plan.
For action thresholds and emergency symptoms, read Dangerous Blood Sugar Levels.
Lancets and Lancing Devices: Practical Safety Tips
A lancet is the small sharp used to puncture the skin. A lancing device is the spring-loaded holder that controls the puncture. The gauge describes lancet thickness: in general, a higher gauge number means a thinner lancet. Comfort also depends on depth, tip design, skin thickness, circulation, and technique.
- Use a new sterile lancet for each test, following the manufacturer’s instructions.
- Choose the shallowest depth that produces enough blood.
- Rotate fingertips and use the side rather than repeatedly puncturing the center.
- Do not reuse a dull or bent lancet; it may hurt more and damage the skin.
- Never share a lancet or reusable lancing device—not even with a family member.
- Keep the meter for one person whenever possible. A personal home meter is not designed for casual sharing.
- Place used lancets immediately in an approved sharps container. Keep it away from children and pets and follow your local disposal rules.
In professional or assisted-testing settings, single-use auto-disabling finger-stick devices are recommended. A reusable lancing device must never move from one person to another because microscopic blood can remain inside it.
How Often Should You Use Test Strips?
There is no one schedule for every person with diabetes. Your testing plan depends on diabetes type, insulin regimen, medicines, hypoglycemia risk, glucose stability, illness, pregnancy, activity, access, and how the result will guide a decision.
People using insulin may be advised to check at selected times such as:
- fasting and before meals or snacks;
- after meals when evaluating food or insulin response;
- at bedtime or during the night when clinically useful;
- before, during, and after exercise;
- when low or high glucose is suspected;
- after treating low glucose until it has returned to a safe range;
- during illness or according to a sick-day plan;
- before and during critical tasks such as driving, according to the personal plan.
For some people with type 2 diabetes who do not use insulin or medicines that cause hypoglycemia, routine daily testing may provide limited benefit unless the readings are used to evaluate a change in food, activity, medicine, or illness. Ask your clinician what to test, when to test, and what action each result should trigger.
Do You Still Need Test Strips If You Use a CGM?
Yes. The American Diabetes Association recommends that people using continuous glucose monitoring also have access to a blood glucose meter. A finger-stick may be needed when:
- CGM symptoms and readings do not match;
- glucose is changing quickly and confirmation is needed;
- the sensor is warming up, unavailable, loose, or showing an error;
- your CGM instructions require confirmation for a treatment decision;
- you suspect compression, interference, or another sensor problem.
Follow the instructions for your specific CGM. Do not assume that one rule applies to every sensor system.
Frequently Asked Questions
Can I reuse a diabetes testing strip?
No. A blood glucose test strip is designed for one blood sample and one test. After use, its chemistry has reacted and blood has contaminated it. Use a new strip for every reading.
Can I use expired test strips if the container was never opened?
No. The strip chemicals can deteriorate over time even in an unopened package. An expired strip may look normal but give an unreliable result.
Do all glucose meters need coding with a new strip box?
No. Most newer meters code automatically. Only enter a code or use a code chip when the instructions for your exact meter and strips require it.
Must I use control solution with every box of strips?
There is no universal rule. Follow the schedule in your meter manual. Control testing is commonly recommended for a new meter, a new vial or lot when specified, suspected storage damage, a dropped meter, or repeated results that do not make sense.
Can I use an alcohol wipe instead of washing my hands?
Soap and water followed by complete drying is preferred when available because it removes sugar and other residue. If your care setting uses alcohol, let it dry completely and follow the meter and clinical instructions.
Why are two consecutive finger-stick readings different?
Small differences are expected because meters have an allowed accuracy range and each blood drop may differ slightly. Larger differences can result from residue, wet hands, insufficient blood, squeezing, strip damage, storage, temperature, or device problems. Wash and dry your hands and repeat with a new strip.
Can family members share one lancing device if the lancet is changed?
No. Blood can remain inside a reusable lancing device, so changing only the lancet does not make it safe for another person. Each lancing device should be assigned to one person.
What should I do if my meter says HI or LO?
Check your meter manual because these messages usually mean glucose is beyond the meter’s measurable range. Consider symptoms and follow your emergency plan. Repeat with clean dry hands and a new strip only if doing so will not delay urgent treatment. Severe symptoms require emergency help.
References
- American Diabetes Association Professional Practice Committee. Diabetes Technology: Standards of Care in Diabetes—2026. Diabetes Care. 2026.
- U.S. Food and Drug Administration. How to Safely Use Glucose Meters and Test Strips for Diabetes.
- U.S. Food and Drug Administration. Blood Glucose Meters: Getting the Most Out of Your Meter.
- U.S. Food and Drug Administration. Risks of Pre-Owned or Unauthorized Home-Use Test Strips.
- Centers for Disease Control and Prevention. Monitoring Your Blood Sugar.
- Centers for Disease Control and Prevention. Considerations for Blood Glucose Monitoring and Insulin Administration.
- U.S. Food and Drug Administration. Best Way to Get Rid of Used Needles and Other Sharps.
Medical disclaimer: This page provides general education and does not replace diagnosis, emergency care, or an individualized glucose-monitoring and treatment plan. Follow the instructions for your exact meter, strips, and lancing device. Speak with your healthcare professional before changing diabetes medicine or insulin based on home readings.